Entering everything by hand (manually)
You can run Selenic Orders entirely by hand, with no ERP or accounts system behind it. Most of these guides talk about connecting one, because that is how many wholesalers run it. A business, or a team taking orders on a trade show stand, can enter its products and customers manually on the tablet and take orders the same day, with nothing else to set up.
1. Set up the tablet
Open the app and press Set this up for my business. The setup checklist walks you through it; for a business with no system to connect:
- Your company name and licence key, as in Getting started.
- Where your data comes from. Choose I will import files by hand. Nothing is synced in, so there is nothing else to connect.
- Your catalogue ticks itself once the first product is in.
2. Type in your catalogue
Everything is under Settings › Admin Settings › Manage Catalogue.
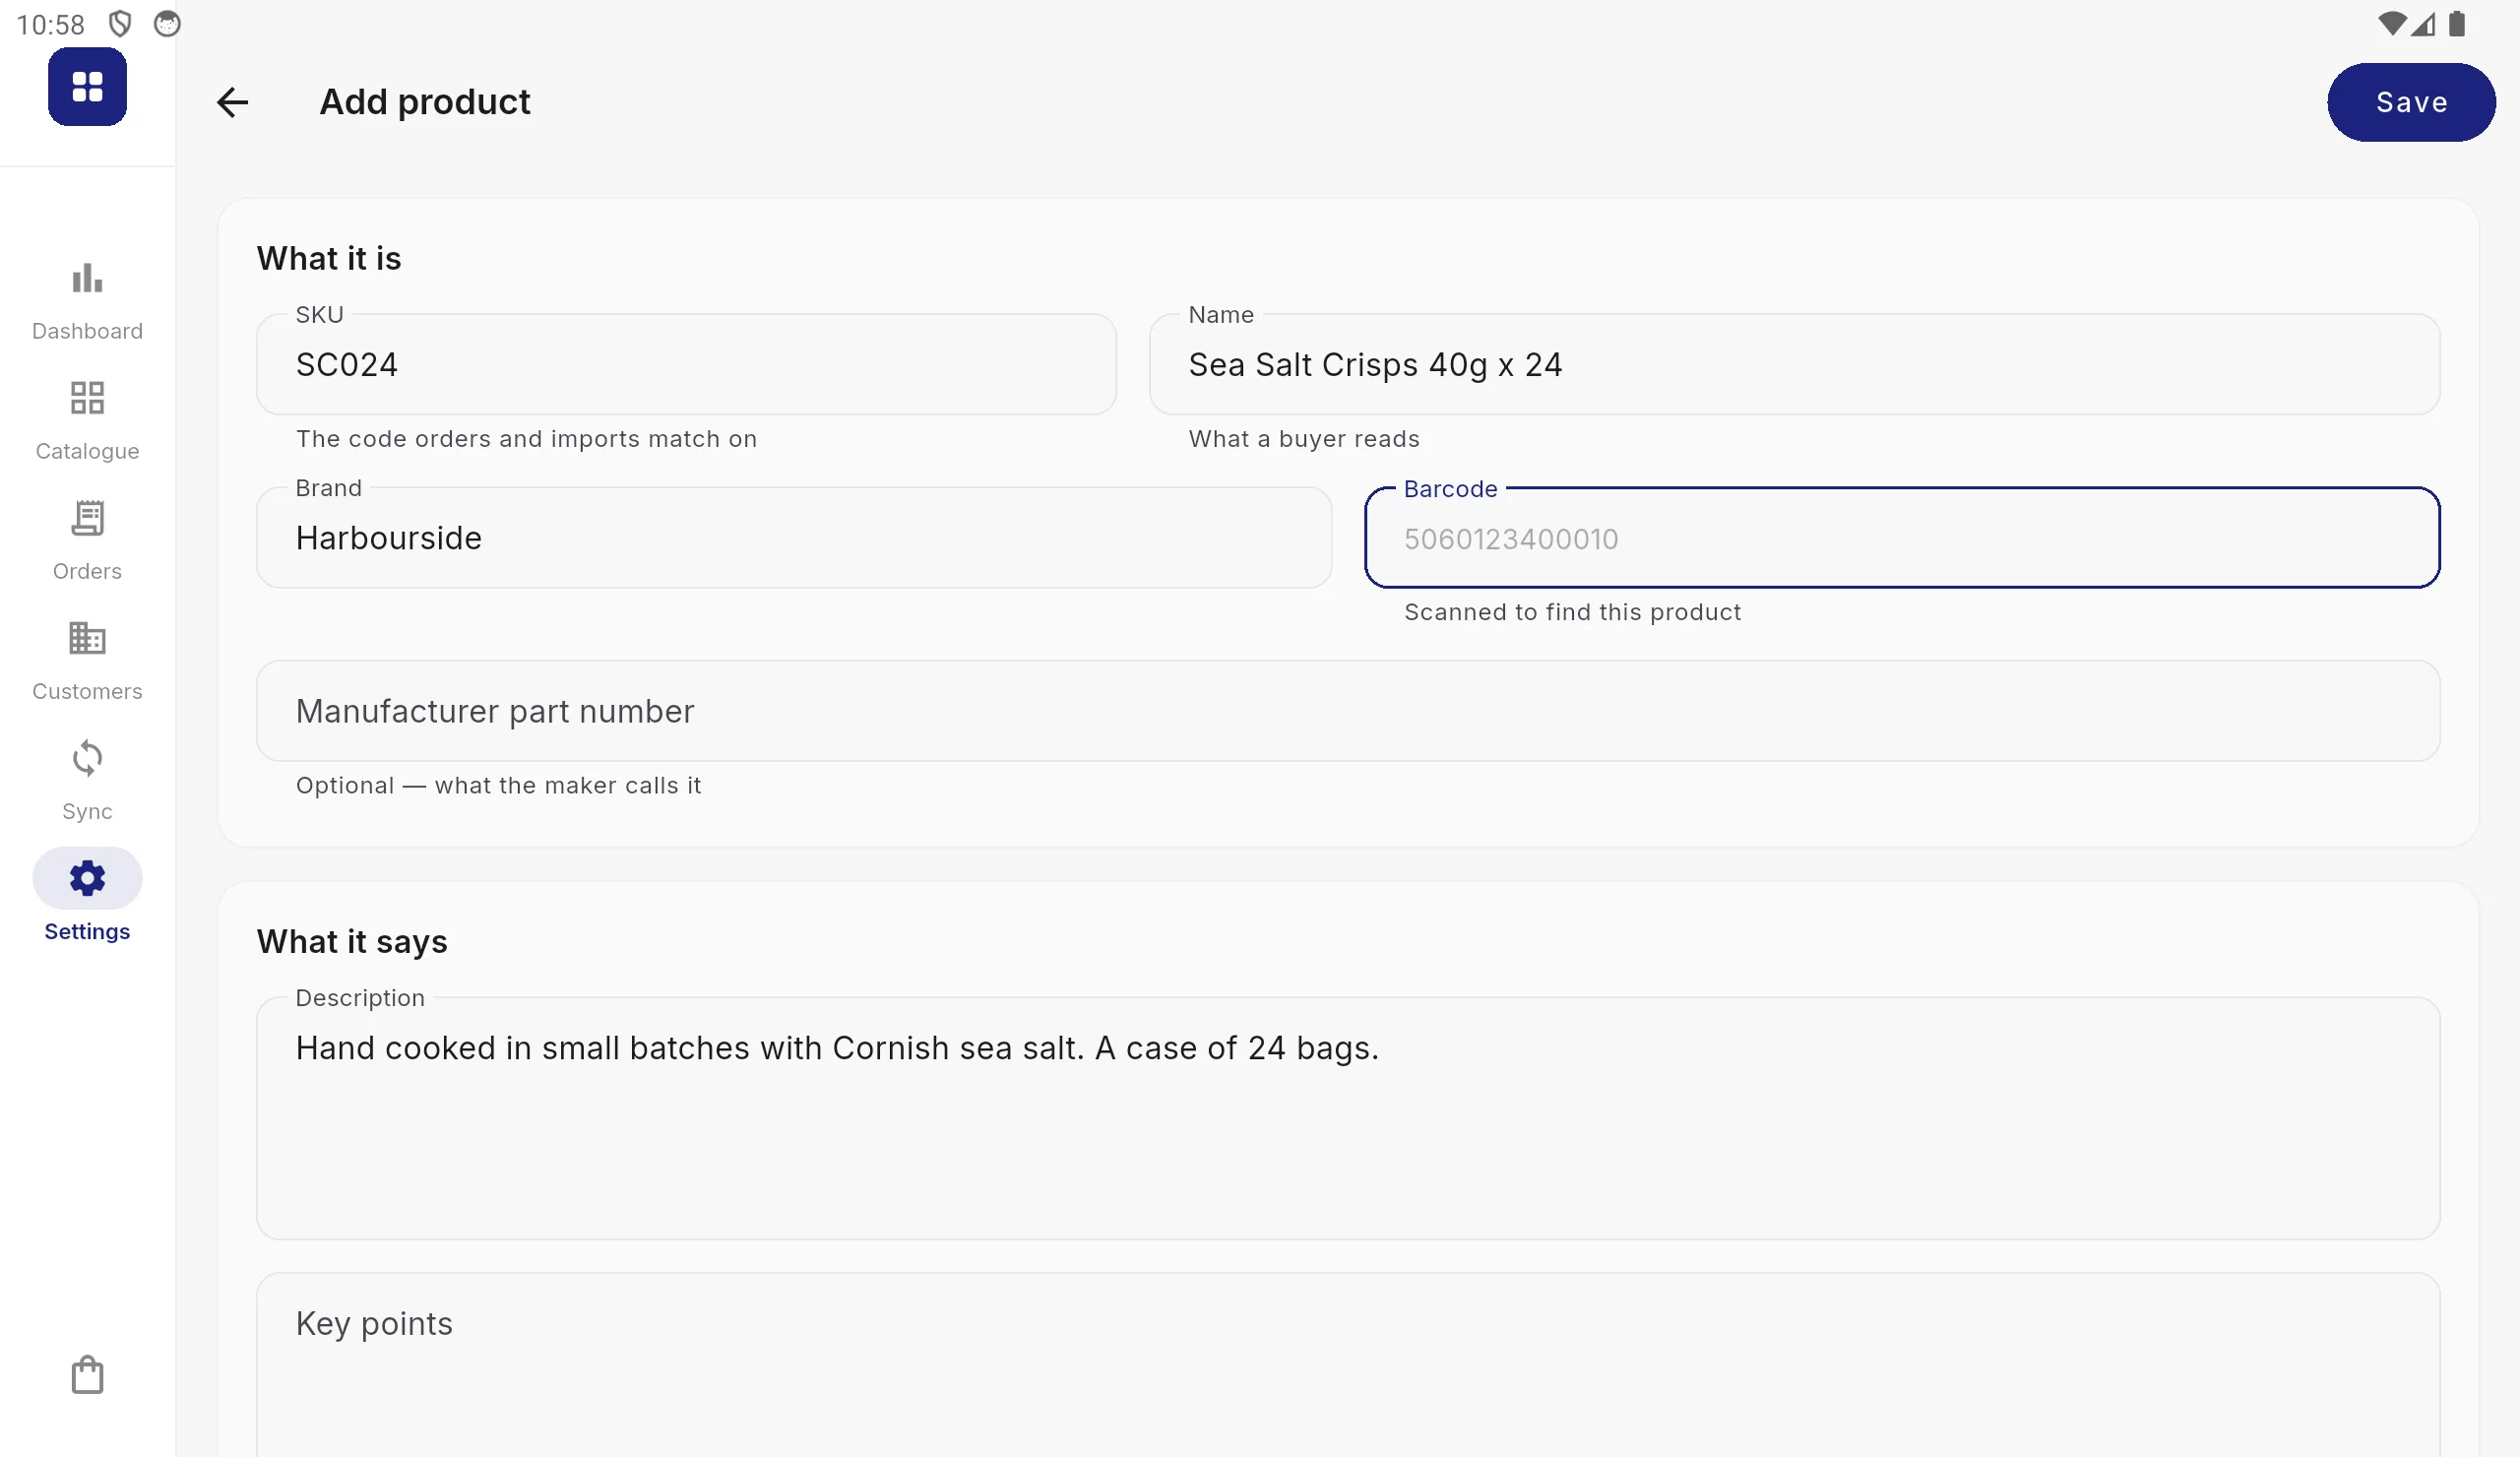
- Products. Press Add product. A product needs a SKU and a name; everything else is optional: brand, barcode, description and key points, list price, cost price, tax code, a sale price, stock, minimum order and order multiple, pack sizes, weight and size, and details of your own such as colour or vintage. Take a photo uses the tablet’s camera, or choose a picture you already have.
- Categories, so reps can browse rather than search.
- Promotions: a percentage or an amount off, or free delivery, with dates if you want them.
- Announcements: news every rep sees on their tablet.
Delivery options are under Settings › Business Rules: what each one charges and when an order will arrive. Without any, orders carry no delivery charge.
3. Take orders
Exactly as with an ERP. Add a new customer at the stand from Customers, with their contact details, VAT number and address, build the order, take the signature and place it. Every order is saved on the tablet the moment it is placed, with or without signal.
Everyone pays the prices you typed in, less any sale price or promotion. Prices agreed per customer, quantity breaks and credit limits are the one part that has to come from a file, because the tablet keeps those as the business’s decision rather than something a rep types. A spreadsheet is enough: see section 5.
4. Get the orders out
Two ways, and you can use both.
- Print it. Open an order and choose Print Order. The tablet’s print screen opens, where you can print it or save it as a PDF to email or keep.
- Collect them as spreadsheet files. Under Settings › Data Integration › Sync & Integration, set Sending to Google Drive or a folder on the tablet. Each sync, or Send Now on a single order, writes the orders as a CSV file that opens straight in Excel or Google Sheets, one row per line ordered. New customers come out the same way.
5. Or keep your products in a spreadsheet
If your product list already lives in Excel or Google Sheets, there is no need to type it in again. Download the sample products file, put your products under its column headings, and save it as CSV. Copy it to the tablet, then use Try a file from this tablet under Receiving to bring it in.
The same works for customers, and it is how per-customer prices, quantity breaks and credit limits get onto the tablet without an ERP. The Products file and Customers file pages say what goes in each column.
You can mix the two: bring the list in from a spreadsheet, then add or correct a product on the tablet. A product added on the tablet is never removed by a later import.
If you grow into an ERP
Nothing has to be started again. Connect it as Connecting your ERP describes, and its files take over from there; the orders already taken stay on the tablet.